
Fixing Holes in Apartment Walls
How to Fix Nail Holes in Apartment Walls: 5 Steps
Icon Apartments | Apartment Tips
You've been living in your apartment for a while now, and it's time to move out. Maybe you found a new job, maybe you’re moving to a new city, or maybe you’re just ready for a new space.
Whatever the reason may be, you're going to need to do something about the holes in the apartment walls. But how much do you know about wall repair?
The good news is that nail holes don't have to leave permanent wall damage. And you don't need to pay for renter repairs since it's an easy repair to do on your own!
At Icon Apartments in Louisville, KY, we deal with wall repairs all the time and want to help you simplify the process so you can make the necessary fixes.
Read on to learn one of the easiest hole repair methods in just 5 easy steps.
What You'll Need to Learn How to Fix Nail Holes in Apartment Walls
If you want to fix nail holes in an apartment wall, you're going to need a few things first. The tools mentioned in this post can be found at any hardware store. They're useful for any reason you might need to patch up a hole in a wall.
First, you're going to need sandpaper to smooth the wall. You'll need some spackle and a trowel to fill in the hole. For larger holes in the wall, you may need a wall patch as well.
- Sandpaper
- Spackle
- Trowel
- Wall Patch (for larger holes in the wall)
- Paint
- Paint Brush (or Paint Roller)
The good news is that many hardware stores might even have all of these items sold together as a wall repair kit, so be sure to ask for assistance at the store to save yourself time, and possibly money.
You will also need a paintbrush and paint that matches the rest of the apartment walls. Otherwise, you might end up with parts of a wall that don't match the rest of the apartment. Most hardware and paint supply stores can easily color match so once all the repairs are done, you won't notice where you did the handiwork.
Keep in mind that the idea is to make your apartment look the same way it did when you moved in. You should be trying to get as close to this goal as possible throughout the process.
1. Remove Screws and Drywall Anchors
The first step to apartment wall repair is to remove any objects that have been fastened to the wall with a nail or a screw from the wall. Try to put these somewhere safe since what you're about to do might get them dirty.
If the item has been hanging there for a while, then you might notice some paint peel when you remove it. Don't worry too much about this yet since you'll be fixing the paint later anyway.
Then go around the room and remove all the screws and drywall anchors that were supporting the items on your walls. You may want to lay down an old towel or large tarp so any debris and paint falling from the wall can easily be cleaned up.
2. Sand It Down
When you remove those screws and drywall anchors, you may notice that the drywall might stick out a little. You'll want to smooth this down so that the wall looks the same as it did when you moved in. Otherwise, you'll leave the walls looking bumpy and strange - a telltale sign that a shoddy repair job has been done.
This is where the sandpaper you purchased comes in. All you need to do is rub it quickly across the hole until it's smooth, so it removes any bumps leftover from the nail removal.
This will do two things- first, it will make it easier to patch the hole when you're ready. And second, it will make it easier to hide that there was ever a hole there in the first place once it's patched.
Go ahead and do this to all of the holes in the room before you move on.
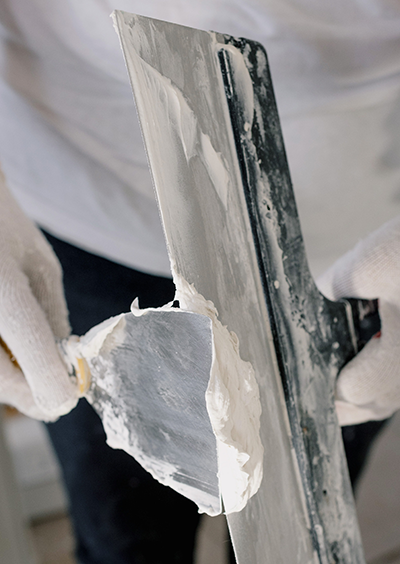
3. Spackle the Hole
The next thing you need to do is patch the hole. Go ahead and open up the spackle or wall putty that you bought, and make sure you have your trowel ready.
Place a small amount of spackle on the trowel and use the flat side to spread it over the hole. Then, use the blade side to smooth it out. Repeat this process on every hole in the room.
Use the edge of the trowel to make the putty as smooth as possible so it seamlessly blends into the wall. But don't worry if it isn't absolutely perfect. You'll be fixing that in a minute anyway.
Using the trowel to smooth it out a little is simply going to make the next step in the process a little easier for you.
4. Sand It Again
At this point, you've technically (and hopefully successfully!) patched the hole. But you still need to repair the texture of the wall and paint it to match the rest of the room.
Give the spackle a chance to dry, which shouldn't take very long depending on the size of the holes you are repairing. For smaller holes, we recommend waiting around an hour to start on this step, otherwise, you will be rubbing sandpaper on wet spackle and removing any work you just did. Make sure to consult the directions on the spackle can to see how long the recommended wait time is.
Once the wall is dried entirely, you're going to grab the sandpaper again. You're going to use this to smooth out the dried spackle and blend it with the rest of the wall. This will also make it much easier to paint over the patched holes in a minute.
Make sure you do this to every hole you've patched in the room. Otherwise, the patch job won't look quite right when you're finished with it.
5. Time to Paint
Before grabbing your paintbrush, we recommend speaking with your leasing agent before painting over anything. There are some apartment communities, like Icon Apartments, that use a special paint type and color, and if you don't match it exactly, it won't have a seamless finish. Some apartment communities will send maintenance up to paint it for you!
Finally, it's time to paint over the patches. This is the final step to making the room look exactly the way it did when you moved in. If you do this part right, it should be very hard to tell that there was ever a hole in the wall at all.
First, you need to be sure that you have the right color of paint. Your property manager could have the color on hand, or at least the name and brand, so you can pick up a small can from the store. This will help you ensure that the paint you use on the hole patches will match the rest of the wall. If you are unable to get the name from your property manager, most stores can color-match based on a sample, so it'll match when you're all done.
Use the paintbrush to cover the patch job. Then, use it in circular motions to try to blend it with the rest of the paint so it won't stick out.

Start Your Apartment Wall Repair Today
The only way you'll learn more about how to fix nail holes in apartment walls is by doing it! It's easy to do, and no one will ever notice the difference. It will also help to ensure that you get your security deposit back.
If you’re on the search for your next apartment, then please visit us here at Icon Apartments. We offer beautiful 1 and 2 bedroom floor plans that blend comfort, style, and breathability. Our central location makes the Icon Apartments community a great option for both students and full-time workers.
Schedule your tour today with one of our leasing specialists. We would love to help you discover your new home in Louisville.